How to Add a Live Chat Support to Blogger

How to Add a Live Chat Support to Blogger
If you're running an Online Store, a Community or an Online Service. A quality Customer Support System really helps you in increasing your sales and interaction with your visitors. While choosing an online service, people look for its features and Live Chat Support is the most crucial.


How to Add a Live Chat Support to Blogger
Having a Live Chat Support system helps you to easily interact with your visitors, so that you can understand their needs, which will help you in improving your services and their experience too. In case of an online store, a Live Chat Support system will help you in increasing your sales. Recently, we received an email from one of our visitors that he wants to add a Live Chat Support system to his blog. In this tutorial we are going to share step by step guide on How to Add a Live Chat Support to Blogger Blog.

It hardly takes 3 minutes to add a Live Chat Support system to your Blog.

Before you add it to your blog, take a look at the image below to see how it looks. On clicking the + button a chat box will open for customer support where your visitors can ask you questions or feedback.
How to Add a Live Chat Support to Blogger

How to Add a Live Chat Support to Blogger Blog 

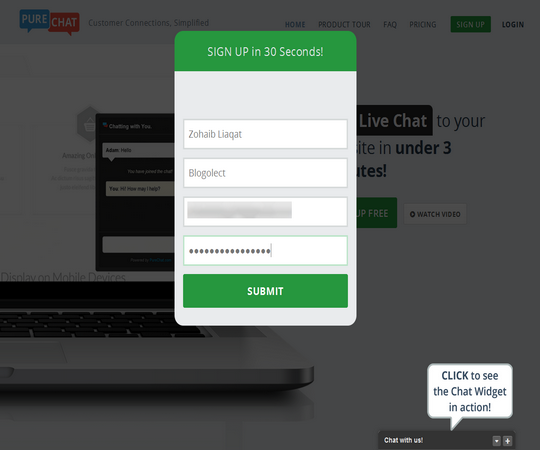
First and foremost, go to http://www.purechat.com and click Sign Up Free button. A popup will appear, enter your login information and click Submit button.


How to Add a Live Chat Support to Blogger Blog
You'll redirected to the next page, a popup will automatically appear with your chat widget code. If you want to add it without any customizations then Copy that code, go to your Blogger Dashboard >> Select a Blog >> Layout >> Add a Gadget >> Select HTML/JavaScript gadget from the list and paste the copied code in the empty widget box.
How to Add a Live Chat Support to Blogger Blog
Otherwise if you want to customize it close that HTML popup, click Chat Widgets button and then click Edit button.
How to Add a Live Chat Support to Blogger Blog

You'll see a plenty of different tabs for customizing each and every section of your widget like Collapsed, Start Chat, No Operators, In Chat etc. You can also customize its Mobile version by clicking the Mobile tab. Customize your chat widget according to your taste and click Save button.


How to Add a Live Chat Support to Blogger Blog
Now click HTML button under the Installation heading, a code will appear, copy that code.


How to Add a Live Chat Support to Blogger Blog

Now go to your Blogger Dashboard >> Select a Blog >> Layout >> Add a Gadget >> Select HTML/JavaScript gadget from the list and paste the copied code in the empty widget box. Finally click Save button and you're done.

How to Add a Live Chat Support to Blogger Blog
Read More

How to Create a Drop Down Menu in Blogger

How to Create a Drop Down Menu in Blogger
A navigation menu/drop down menu makes your blog/website user-friendly by allowing your visitors to easily navigate your blog posts by just selecting categories from the menu. A navigation menu plays an important role in your blog development, either its a top website like Mashable or a newly created blog, a drop down menu is an essential element of every website. It makes your blog user-friendly, easy to navigate and also adds a new and unique look to your design and makes it look professional. After reading all these advantages if you want to add a Drop Down menu to your Blog/Website, then in this tutorial we'll show you that how to create a Drop Down Menu in blogger. The credit goes to MBT. The design we're going to share today is simple, clean and will surely attract your visitors.

How to Create a Drop Down Menu in Blogger

How to Create a Drop Down Menu in Blogger

First and foremost, log in to your Blogger Account >> Select a Blog >> Template and click Edit HTML. Click inside the template code area and by using Ctrl+F search for the ]]></b:skin> tag. Now copy the below code and paste it just above/before it (]]></b:skin> Tag)

body {
margin: 0px;
}
#menu{
background: #3EA9AC;
color: #fff;
height: 40px;
text-transform:uppercase;
border-bottom: 2px solid #3EA9AC;
box-shadow: 1px 2px 9px #B1B1B1;
border-top: 1px solid #3EA9AC;
}
#menu ul,#menu li{margin:0 auto;padding:0 0;list-style:none}
#menu ul{height:45px;width:1024px}
#menu li{float:left;display:inline;position:relative;font:'Open Sans',Helvetica,Arial,sans-serif;text-shadow: 1px 2px 4px #838383;}
#menu a{display: block;
line-height: 40px;
padding: 0 14px;
text-decoration: none;
color: #fff;
}
#menu li a:hover{
color: #E4E4E4;
-webkit-transition: all .1s ease-in-out;
-moz-transition: all .1s ease-in-out;
-ms-transition: all .1s ease-in-out;
-o-transition: all .1s ease-in-out;
transition: all .1s ease-in-out;
background: #5FC6EB;
}
#menu input{display:none;margin:0 0;padding:0 0;width:80px;height:30px;opacity:0;cursor:pointer}
#menu label{font:'Open Sans',Helvetica,Arial,sans-serif;display:none;width:35px;height:36px;line-height:36px;text-align:center}
#menu label span{font-size:16px;position:absolute;left:35px}
#menu ul.menus{
height: auto;
overflow: hidden;
width: 170px;
background: #3EA9AC;
position: absolute;
z-index: 99;
display: none;
}
#menu ul.menus li{
display: block;
width: 100%;
font:'Open Sans',Helvetica,Arial,sans-serif;
text-transform: none;
text-shadow: none;
border-bottom: 1px dashed #31AFDB;
}
#menu ul.menus a{
color: #FFF;
line-height: 35px;
}
#menu li:hover ul.menus{display:block}
#menu ul.menus a:hover{
background: #5FC6EB;
color: #FFF;
-webkit-transition: all .1s ease-in-out;
-moz-transition: all .1s ease-in-out;
-ms-transition: all .1s ease-in-out;
-o-transition: all .1s ease-in-out;
transition: all .1s ease-in-out;
}

Now again Search for the <body> tag and just below it add the following code

    <nav id='menu'>
    <input type='checkbox'/>
    <label>&#8801;<span>Blogolect</span></label>
    <ul>
    <li><a href='/'>Home</a></li>
    <li><a href='#'>Contact</a></li>
    <li><a href='#'>Drop Down 1<font size='1'>&#9660;</font></a>
    <ul class='menus'>
    <li><a href='#'>Tab No 1</a></li>
    <li><a href='#'>Tab No 2</a></li>
    <li><a href='#'>Tab No 3</a></li>
    <li><a href='#'>Tab No 4</a></li>
    <li><a href='#'>Tab No 5</a></li>
    <li><a href='#'>Tab No 6</a></li>

    </ul>
    </li>
    <li><a href='#'>Services</a></li>
    <li><a href='#'>Drop Down 2<font size='1'>&#9660;</font></a>
    <ul class='menus'>
    <li><a href='#'>Tab No 1</a></li>
    <li><a href='#'>Tab No 2</a></li>
    <li><a href='#'>Tab No 3</a></li>
    </ul>
    </li>
    <li><a href='#'>Advertise</a></li>
           </ul>
        </nav>

  • Replace Blogolect with your Blog name
  • Replace # with the Links and rename the categories

Finally click Save Template button and you're done!
Read More

How to Change the Text Selection Highlighting Color in Blogger

How to Change the Text Selection Highlighting Color in Blogger
The quickest way of selecting/copying text from a blog/website is to drag your mouse over that content. The selected content becomes highlighted. Mostly the highlighted text color is blue (Default color). Have you noticed that when you highlight/select text on some top websites, the text's background color is unique and matches the site's color scheme? So, have you ever wanted to change the highlighted text color of your blog? If yes then today we will show you that How to Change the Text Selection Color in Blogger. Its really easy to do and can be done with just the tiniest bit of simple CSS codes. This trick works on Chrome, Firefox, Safari and on latest versions of I.E.

How to Change the Text Selection Highlighting Color in Blogger

Step 1. Go to your Blogger Dashboard >> Select a Blog >> Template and click Edit HTML button
Step 2. Click inside the template code area and by using Crtl+F search for the ]]></b:skin> tag
Step 3. Now copy (Ctrl+C) the below code and paste (Ctrl+V) it just above/before it (]]></b:skin> tag)

::-moz-selection  {
background: #00cc00;
color: #FFFFFF;
text-shadow: none;  }
::selection   {
background: #00cc00;
color: #FFFFFF;
text-shadow: none; }

Customization:
  • Replace 00cc00 with the text highlight color
  • Replace FFFFFF with the text color (highlighted text color)

Step 4. Click Save Template button
And you're done!
Congratulations: You've successfully changed your Text Selection Highlighting Color. 

From Editors Desk

We hope this article may have helped your in learning How to Change the Text Selection olor in Blogger.
Read More

How to Create an Image Rollover Effect

How to Create an Image Rollover Effect
The Image Rollover effect is one in which image changes on moving your mouse cursor on the image. It changes the image on moving mouse cursor on it and reverts it back to the original image on mouse out. Image Rollover is a popular effect used in many websites. Bloggers use this effect for gaining visitors attention. There is nothing technical in creating this effect, all you need is just two pictures. The onMouseOver and outMouseOut attributes are used to make it functional. Image Rollover is a simple trick that you can use for gaining attention of your visitors.
Move your Mouse Cursor on the Image below to see how it works:


How to Create an Image Rollover Effect

Here's the code for creating a Rollover Effect:

<a href="URL ADDRESS"><img src="URL OF THE FIRST IMAGE" onmouseover="this.src='URL OF THE SECOND IMAGE'" onmouseout="this.src='URL OF THE FIRST IMAGE" /></a>

Customization:

  • Replace URL ADDRESS with the URL where you want to redirect people on clicking
  • Replace both URL OF THE FIRST IMAGE with the URL of your first image
  • Replace URL OF THE SECOND IMAGE with the URL of your second image (That will appear on mouse hover)

How to Use Image Rollover Effect in Blogger Posts

Log in to your Blogger Account >> Select a Blog >> New Post and Switch to HTML tab. Now copy the above code and paste it where you want to add the image in your post. Make necessary customizations and Publish your Post.

How to Use Image Rollover Effect in Blogger Sidebar

Log in to your Blogger Account >> Select a Blog >> Layout >> Add a Gadget and select HTML/JavaScript gadget from the list. Paste that code, make necessary customization and click Save button.
Read More

How to Customize Labels Cloud Widget in Blogger

How to Customize Labels Cloud Widget in Blogger
Do you want to make your Labels Cloud widget more prominent and attractive for your visitors? Labels Cloud is a widget provided by Blogger, that allow you to arrange your content or categorize your content under specific labels. This widget helps your visitors to easily browse your posts by choosing a specific label or category. This widget makes your blog user friendly. You can add this widget to your sidebar or footer.

The default design of the Labels Cloud widget is simple and not that much attention-grabbing. Therefore, to make it look clean and stylish, we've to customize it. As Blogger is a flexible platform and you can easily customize any element of your blog using CSS. So, we'll also customize the Labels Cloud using CSS3. Recently, one of our visitors asked us that How to Customize Labels Cloud Widget in Blogger. In this article, we'll show you that How to Customize Labels Cloud Widget in Blogger.

Don't Forget to Read:
101 Ways to Increase Your Website Traffic
5 Reasons You'll Quit Blogging Within 3 Months
18 Reasons Why Newbie Bloggers Quit Blogging


How to Customize Labels Cloud Widget in Blogger

First and foremost, Log in to your Blogger Account >> Select a Blog >> Template and click Edit HTML. Click inside the template code area and by using Ctrl+F search for the ]]></b:skin> tag. Now copy the below code and paste it just above/before it (]]></b:skin> Tag)

/*---------Labels Cloud--------*/
.label-size{
margin:0 2px 6px 0;
color:#666;
padding: 7px;
border: solid 1px #C6C6C6;
border-radius: 3px;
text-transform: uppercase;
text-decoration:none;
float:left;
text-decoration:none;
font-size:14px;
color:#666;
}

.label-size:hover {
border:1px solid #6BB5FF;
text-decoration: none;
-moz-transition: all 0.5s ease-out;
-o-transition: all 0.5s ease-out;
-webkit-transition: all 0.5s ease-out;
-ms-transition: all 0.5s ease-out;
transition: all 0.5s ease-out;
}

.label-size a  {
float:left;
text-transform: uppercase;
text-decoration: none;
color:#fff;
}
.label-size a:hover  {
text-decoration: none;
color:#2aa4cf;
}

Hit the Save Template button and you're done.
Congratulations: You've successfully customized your Labels Cloud widget.

From Editors Desk

We hope this article may have helped you in customizing Labels Cloud widget. Share this article with your friends, don't forget to subscribe
Read More

Add a Christmas Snow Fall Effect to your Blogger Blog

Add a Christmas Snow Fall Effect to your Blogger Blog
Christmas is just a few days away, everyone is warming up and soon it will knock the doors of bloggers and the entire world. If you want to impress your visitors and you want to give them a Christmas surprise then this is the right time to show your skills. There are hundreds of Christmas surprises that you can give to your visitors. Today we're going to share one of them that is called Snow Fall Effect. This effect will display a Snow Fall on your blog and that it will definitely surprise your visitors.


Add a Christmas Snow Fall Effect to your Blogger Blog
If you're thinking to decorate your blog this Christmas and you want to give them a mind blowing surprise then you're at the right place. Its time to show your skills and amaze your visitors by adding Snow Fall effect to your blog. In this tutorial we'll show you that How to Add a Christmas Snow Fall Effect to your Blogger Blog.

Add Snow Fall Effect to your Blogger Blog

Step 1. Go to your Blogger Dashboard >> Select a Blog >> Template and click Edit HTML button
Step 2. Click inside the template code area, use Ctrl+F and search for the </head> tag
Step 3. Now Copy (Ctrl+C) the below code and Paste (Ctrl+V) it just above/before the </head> tag

<script src='https://ajax.googleapis.com/ajax/libs/jquery/1.9.1/jquery.min.js'/>
<script src='http://yourjavascript.com/146111102320/snowfall.js'/>

<script>
$(document).ready( function(){
$.fn.snow({ minSize: 10, maxSize: 50, newOn: 400, flakeColor: '#ffffff' });
});
</script>

Note: Remove the code in purple color if you already have jQuery in your template.
Customization:
  • Increase or Decrease the minimum size of snow by changing the value in minSize: 10,
  • Increase or Decrease the maximum size of snow by changing the value in maxSize: 50,
  • Increase or Decrease the value in the newOn: 400, option for changing the snow fall speed
  • To change the snow color replace #ffffff with your own color code

Step 4. Click Save Template button
And you're done!

From Editors Desk

We hope this article may have helped you in adding a snow fall effect to your blogger blog. Share this article with your friends and don't forget to Join our Bloggers Forum on
Read More